Navigasi

Showing posts with label blur. Show all posts

Tuesday, September 1, 2015

How to make bokeh photography


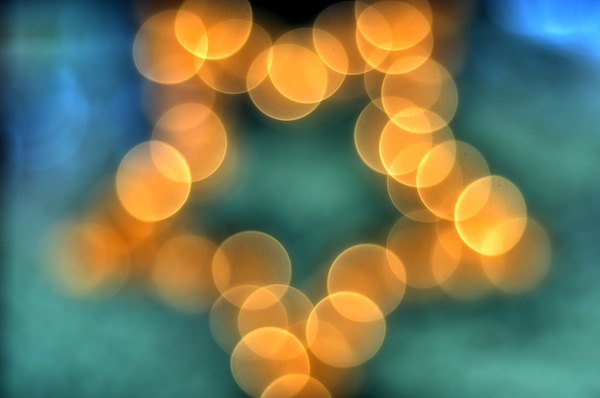
Original Bokeh is a Japanese word meaning 'blurred', so is the bokeh photograph photographs that highlight the characteristics of a main object of focus is very sharp while the background (or foreground) is very vague, or in English selective focusing. In the example above the beautiful photos (the work of Sector Two), the main object model face is very sharp, but the background is the door to look very blurry (motion blur). Well, nature is called bokeh blurred. How can so that we can produce bokeh like this photo.

The emergence of bokeh in the photo still want any moving picture is influenced by various factors
interacting, among others:

1. The distance between the main part of image / subject to background / foreground

Generally bokeh will look when the distance between the main object with background / foreground far enough. But distance is not a fixed variable in obtain bokeh, still influenced by other factors, as well as the good and bad bokeh.

2. Large aperture

Difficult to bring up the narrow aperture bokeh. Generally bokeh will look at large aperture provided background / foreground blur is not maximal. That is bokeh will look when the piece is still indistinguishable dark light or still have gradation.

3. Lens focal / focal length

The bigger the fire point of a lens, the more possible since the advent bokeh DOF increasingly narrow. The use of wide angle lens is very difficult to produce bokeh.

4. Type / design of the lens including the lens of pieces of material

Lens design does not directly affect the onset of  bokeh, but very effect on the quality of bokeh produced. But unfortunately, not high-quality lens necessarily produce good bokeh quality. Lenses with different corrections, which improve the sharpness of the image, it produces worse quality bokeh.

Lens reflex (Catadioptric lens), which include elements of the lens with a mirror, cause the typical ring-shaped bokeh, donut-shaped. This happens because the center of the cone of light is not blocked by the focus ring mounted mirror right in the middle circumference of the lens (the smaller the circumference of the mirror) 

Soft lenses, generally produce less good bokeh, because the center of each bokeh less soft than the point of interest, so we need special filters to fix it.
(Note: different from the soft out of focus in general) 


5. The number and shape of pieces / blade diaphragm
Number of diaphragm and pieces do not really have a direct link with the onset of bokeh, but only contributes to the shape bokeh. Most of the lens maker always linking number plate diaphragm with bokeh quality, and unfortunately accepted this opinion by most photographers, especially those who lack understanding of optical physics. in understanding they are, more shape of pieces, more better for bokeh. When in fact the many pieces of diaphragm just make bokeh more rounded shape, with consequences the more expensive lenses. There are other things about the pieces of the diaphragm is to know, ie the number of odd pieces of the diaphragm, can cause effects that are sometimes sought after photographers, the beam star-shaped around a very bright spot in the region out of focus. But generally appear the narrow aperture. The number of beam lines generated 2 times the shape amount, eg: diaphragm with a number of chips 5, will cause a star shape with 10 rays at each point of light. Diaphragm with an even number of chips just cause star shape with the number of jets equal to the number shape of pieces so that the diaphragm 8 pieces produce only stars with eight rays. But once again we must emphasized that it was only in form, not on the distribution of rays that cause bokeh.

Now i'll give tips how to make a bokeh photography :

  1. Use / set the camera on manual mode (Aperture Priority
  2. Use the aperture as much as possible, usually there is writing on the lens f / x, the smaller the aperture the greater x is.
  3. Calculate the distance to the object background images, if the distance to objects far background the importance of the photo is very blurry.
  4. Use of Non-Zoom lens with high aperture
  5. Many training course

Wednesday, October 5, 2011

Make unique photography with pinhole camera

" Did you know about Pinhole Camera ? What's Pinhole Camera ? "

Now in this article i wanna explain and gift example about Pinhole Camera.

WHAT IS A PINHOLE CAMERA?

A pinhole camera, also known as camera obscura, or "dark chamber", is a simple optical imaging device in the shape of a closed box or chamber. Basically a pinhole camera is a box, with a tiny hole at one end and film or photographic paper at the other. In one of its sides is a small hole which, via the rectilinear propagation of light, creates an image of the outside space on the opposite side of the box.


Pinhole cameras are small or large, improvised or designed with great care. Cameras have been made of sea shells, many have been made of oatmeal boxes, coke cans or cookie containers, at least one has been made of a discarded refrigerator. Cameras have been cast in plaster like a face mask, constructed from beautiful hardwoods, built of metal with bellows and a range of multiple pinholes. Station wagons have been used as pinhole cameras – and rooms in large buildings.

Pinhole photography is lensless photography. A tiny hole replaces the lens. Light passes through the hole; an image is formed in the camera. Pinhole cameras are used for fun, for art and for science.


PRINCIPLE AND CHARACTERISTICS OF PIN HOLE CAMERA

As mentioned above, the image in the pinhole camera is created on the basis of the rectilinear propagation of light. Each point on the surface of an illuminated object reflects rays of light in all directions. The hole lets through a certain number of these rays which continue on their course until they meet the projection plane where they produce a reverse image of the object. Thus the point is not reproduced as a point, but as a small disc, resulting in an image which is slightly out of focus. This description would suggest that the smaller the hole, the sharper the image.


The image created by a pinhole camera has certain characteristics which we won't find in classical lens photography. Another special characteristic is the infinite depth of field which, in a single photograph, allows objects to be captured with equal sharpness whether they are very close up or far away.

The pinhole camera takes in an extremely wide angle. The rays of light, however, take much longer to reach the edges of the negative than the centre, thus the picture is less exposed along the edges and therefore darkens.

A certain disadvantage of the pinhole camera is the amount of light allowed through (small aperture), which complicates and sometimes prevents entirely the photographing of moving subjects. Exposure time is normally counted in seconds or minutes but, in bad lighting conditions, this could be hours or even days (see Determining exposure times for pinhole cameras).


Pinhole images are softer – less sharp – than pictures made with a lens. The images have nearly infinite depth of field. Wide angle images remain absolutely rectilinear. On the other hand, pinhole images suffer from greater chromatic aberration than pictures made with a simple lens, and they tolerate little enlargement.

Exposures are long, ranging from half a second to several hours. Images are exposed on film or paper – negative or positive; black and white, or color.

Pinhole optics, by the way, are not only used in photography. There is one animal in nature which uses a pinhole for seeing – the mollusk Nautilus. Each eye has an accommodating aperture – the aperture can enlarge or shrink. In this drawing, originally taken from a book published by Arthur Willey in 1900, the eye is the oval opening to the upper right.

This sample result of Pinhole Photography :


LETS MAKE OWN PINHOLE CAMERA

After We know about what is pinhole camera and know about the principle and characteristic, now lets do some experiment to make own pinhole camera. For tutorial you can watch for video below :


for other tutorial you can visit :


Formulas

According to Eric Renner at least 50 charts suggesting optimal pinhole diameters have been devised in the last 125 years (Renner 1995:118). In my own reading the last six years I have come across about fifteen charts or formulas, a few of which may be derived from the same basic formulas. It should be noted that the diameter of the pinhole is not really critical. But for every focal length there is an "optimal" diameter, i.e. a diameter which produces the sharpest possible image. The word optimal actually is not a felicitous term, since the pinhole photographer or artist may not be striving for the greatest possible sharpness. There are beautiful pinhole images which are intentionally softer than what is technically possible. A good pinhole image is something else than a blurred, out of focus, lens image.
Up to a certain point a small pinhole will produce a sharper image than a larger one. If the pinhole is too small, the image gets less sharp because of diffraction. The hole should be perfectly round, without ragged edges. It may be checked with a magnifier or an enlarger.
Joseph Petzval of Vienna apparently was the first, in 1857, to attempt to find a mathematical formula of the optimal pinhole diameter for the sharpest definition in a pinhole image. The British Nobel Prize winner Lord Rayleigh (John William Strutt, 1842–1919) worked on pinhole diameter formulas for ten years and published his work in Nature (1891). Lord Rayleigh's formula is still one of the formulas used to today. A number of others have been published since the 1880s.
Lord Rayleigh's formula for subject distances above 1 meter may be written as follows:
d = 1.9 * sqrt (l * f),
where d = pinhole diameter, l = wavelength of light and f = focal length or distance from pinhole to light-sensitive material.
For the wavelength of light different average values may be substituted. Often the value of the yellow-green spectrum is used, i.e. 0.00055 mm.
According to Renner (1995: 117) most formulas used today are of the following general form:
r = sqrt (l * c * f)
r = pinhole radius
l = wavelength of light
c = a constant, usually a decimal fraction between 0.5 and 1
f = focal length
Platt (1989:73) provides the following optimal pinhole formula:
d x d = f/k, where k is a constant of approx. 1300
Dobson (1991) provides this formula:
d = sqrt (f)/25
Lord Rayleigh's formula and those published by Platt and Dobson all give somewhat different results. Andrew Davidhazy of the Rochester Institute of Technology lists several other formulas in a posting on the net.
Four, slightly different, charts of optimal pinhole diameters are reproduced below. Some of the charts have been simplified by leaving out references to needle numbers. Holter's chart, published in Norwegian, has been translated by me. Platt's chart differs from the others by consistently giving smaller apertures.

Bogre (1988)


Focal length Best aperture diameter Equivalent f-stop Exposure factor for f/22
50 mm 0.29 mm f/174 63 x
75 mm 0.35 mm f/213 94 x
100 mm 0.41 mm f/246 125 x
125 mm 0.45 mm f/275 157 x
150 mm 0.50 mm f/203 188 x
200 mm 0.57 mm f/348 250 x
250 mm 0.64 mm f/389 313 x
300 mm 0.70 mm f/426 376 x

Platt (1989)


Focal length (mm) Pinhole diameter (mm) f-stop
130 0.33 380
210 0.40 500
260 0.46 550
320 0.50 650
420 0.58 690
550 0.66 800
650 0.74 930
750 0.79 960
1000 0.91 1120

Holter (1990)


Focal length (mm) Pinhole diameter (mm) f-stop Exposure factor for f/16
10 0.14 70 20
20 0.20 100 40
30 0.24 125 60
40 0.28 140 80
50 0.31 160 100
60 0.34 180 125
70 0.37 190 140
80 0.40 200 160
90 0.42 214 180
100 0.45 220 190
150 0.54 280 300
200 0.63 318 400
250 0.70 360 500
300 0.78 380 560
350 0.84 418 700
400 0.89 450 800

Fuller (1992)

It should be borne in mind that for most purposes the diameter is not really critical, as the different values in the charts above may demonstrate.

If you wanna get accurate calculation you can try this software : PINHOLEDESIGNER 2.0 you can donwload Here
Program window for calculating the optimal diameter of the pinhole and optimal focal length.

Program window for calculating exposure times.


Friday, September 9, 2011

Learning for Bokeh & Macro

After i look and learning from my article, i try to practice to take a shoot bokeh & macro photo style. Now i wanna show my result.


i take this photo in my friends wedding, i love chocolate, so i take this picture :D


This photo I took when I was hiking on Mount Pangrango, in the morning a beautiful and sunny, here I want to capture natural freshness and taste is still preserved.

Tuesday, August 16, 2011

4 Rules about photography


4 Rules About 
Photography
Before we plunge into the world of photography more deeply, we should know the basic of these photography techniques. Among them is that we must understand the rules about photography.
Here I will describe some rules in photography, including: Composition Line, Geometric Shapes, The Rule of Thirds, Framing Images.


1. Composition Line
The composition of the POI is how we put in the frame so that the concept of balance and simplicity going on there.

Line has an important role as one element supporting the theory of composition. Lines meant here who could have been formed from the angle and position the frame so that the line formed from actual objects, like trees, railroads, power lines and other objects that make up the line.

Lines can also provide an additional effect on the visual and emotional impact of the picture because:

- Additional lines can display a dynamic impression in photos
- A line of photo lovers invited to direct his attention to the area (POI)
- Lines can also create depth (depth) in a composition field.
- A line we can use as well as directions and orientation in the image, etc.

In addition, understand the theory of composition is important because such lines could invite a response from the audience of how photographs They feel and mood from conducting your photos, which then becomes a challenge, how we "use" and "use" lines to draw the attention of connoisseur photos.

For this type of line we can reply "use" in adding the composition of our picture frames include :

- Leading lines,

- Vertical lines, 

- Horizontal lines,

- Diagonal lines,

- Curve lines,

- Perspective lines.
composition of several lines above each can cause different effects in the cause and evoke the mood for photos viewers.

2. Geometric Shapes


With the position of the key aspects of the landscape at the corner of geometric shapes you can help create a balanced composition. Probably the most common and easiest way to do this is to use the 'triangle' forms between objects in an image with three objects in the frame is positioned with one for each side and one center. Geometric shapes used in this way is one technique to get a balance in the shooting to lead the eye into the photo shooting (in the same way with diagonal lines above rules).


3. The Rule of Thirds

The Rule of Thirds will come out more often than others in all types of photography and is one of the first regulation of the composition is taught to students of photography. Although it sometimes feels a bit cliche this may also be a very effective technique in landscapes (although keep in mind that the breaking (and other rules) can also produce images that are dramatic and exciting). Key points in the landscape position is on the point of intersection between an imaginary 'third' dots in the picture and you will help provide balance to the images that you shoot an image focal point and help to really grab attention.

4. Framing Images

Many of us often put the photos in a frame, both frames as a means of displaying images (such as picture frames for wall hung, placed on a table / nightstand or other places), as well as limiting virtual frame image area with the photo paper / other print media .

The benefit of framing the image include:
1. Giving context to the photo
2. Adding a message of the photo
3. Gives the impression of more than photos
4. Creating a point of view of photo
5. Attracting viewers of your photos.

Frame for a photograph can be obtained from any and all objects, including tree branches, mirror, shot through the window, from behind the fence, behind the foliage, behind the gate, even from the person's head and shoulders, and others.

The above rule is not a rule that must be applied in photography. Rules can be used as a material consideration in taking a picture. For me personally a good outcome is determined from the imagination and creativity of each individual. Hopefully this article helps: D

Friday, August 12, 2011

How to make bokeh photography


Original Bokeh is a Japanese word meaning 'blurred', so is the bokeh photograph photographs that highlight the characteristics of a main object of focus is very sharp while the background (or foreground) is very vague, or in English selective focusing. In the example above the beautiful photos (the work of Sector Two), the main object model face is very sharp, but the background is the door to look very blurry (motion blur). Well, nature is called bokeh blurred. How can so that we can produce bokeh like this photo.

The emergence of bokeh in the photo still want any moving picture is influenced by various factors interacting, among others:

1. The distance between the main part of image / subject to background / foreground


Generally bokeh will look when the distance between the main object with background / foreground far enough. But distance is not a fixed variable in obtain bokeh, still influenced by other factors, as well as the good and bad bokeh.

2. Large aperture


Difficult to bring up the narrow aperture bokeh. Generally bokeh will look at large aperture provided background / foreground blur is not maximal. That is bokeh will look when the piece is still indistinguishable dark light or still have gradation.

3. Lens focal / focal length

The bigger the fire point of a lens, the more possible since the advent bokeh DOF increasingly narrow. The use of wide angle lens is very difficult to produce bokeh.

4. Type / design of the lens including the lens of pieces of material

Lens design does not directly affect the onset of bokeh, but very effect on the quality of bokeh produced. But unfortunately, not high-quality lens necessarily produce good bokeh quality. Lenses with different corrections, which improve the sharpness of the image, it produces worse quality bokeh.

Lens reflex (Catadioptric lens), which include elements of the lens with a mirror, cause the typical ring-shaped bokeh, donut-shaped. This happens because the center of the cone of light is not blocked by the focus ring mounted mirror right in the middle circumference of the lens (the smaller the circumference of the mirror)

Soft lenses, generally produce less good bokeh, because the center of each bokeh less soft than the point of interest, so we need special filters to fix it.
(Note: different from the soft out of focus in general)

5. The number and shape of pieces / blade diaphragm


Number of diaphragm and pieces do not really have a direct link with the onset of bokeh, but only contributes to the shape bokeh. Most of the lens maker always linking number plate diaphragm with bokeh quality, and unfortunately accepted this opinion by most photographers, especially those who lack understanding of optical physics. in understanding they are, more shape of pieces, more better for bokeh. When in fact the many pieces of diaphragm just make bokeh more rounded shape, with consequences the more expensive lenses. There are other things about the pieces of the diaphragm is to know, ie the number of odd pieces of the diaphragm, can cause effects that are sometimes sought after photographers, the beam star-shaped around a very bright spot in the region out of focus. But generally appear the narrow aperture. The number of beam lines generated 2 times the shape amount, eg: diaphragm with a number of chips 5, will cause a star shape with 10 rays at each point of light. Diaphragm with an even number of chips just cause star shape with the number of jets equal to the number shape of pieces so that the diaphragm 8 pieces produce only stars with eight rays. But once again we must emphasized that it was only in form, not on the distribution of rays that cause bokeh.


Now i'll give tips how to make a bokeh photography :

1. Use / set the camera on manual mode (Aperture Priority)
2. Use the aperture as much as possible, usually there is writing on the lens f / x, the smaller the aperture the  
    greater x is.
3. Calculate the distance to the object background images, if the distance to objects far background the 
    importance of the photo is very blurry.
4. Use of Non-Zoom lens with high aperture
5. Many training course