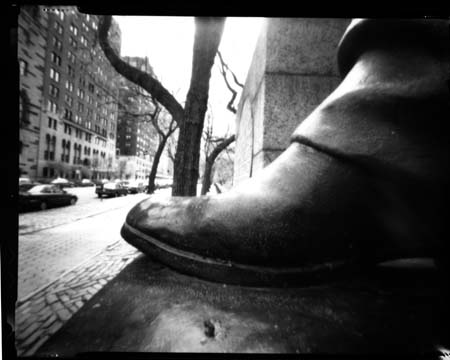
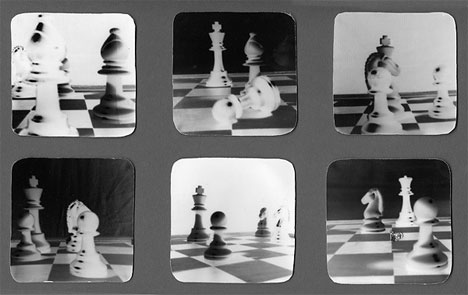
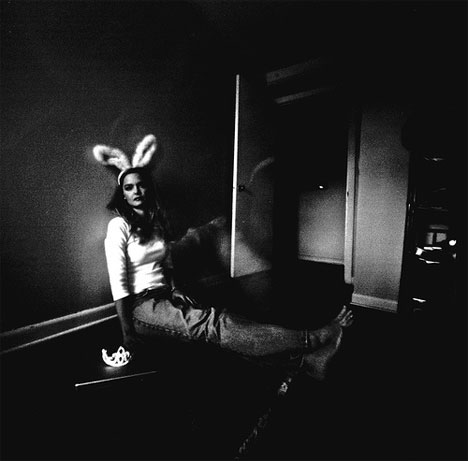
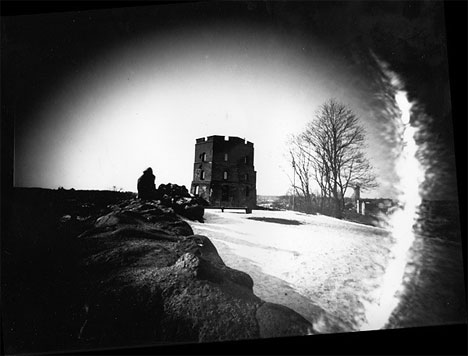
" Did you know about Pinhole Camera ? What's Pinhole Camera ? "
Now in this article i wanna explain and gift example about Pinhole Camera.
WHAT IS A PINHOLE CAMERA?
 A pinhole camera, also known as camera obscura, or "dark chamber", is a simple optical imaging device in the shape of a closed box or chamber. Basically a pinhole camera is a box, with a tiny hole at one end and film or photographic paper at the other. In one of its sides is a small hole which, via the rectilinear propagation of light, creates an image of the outside space on the opposite side of the box.
 Pinhole cameras are small or large, improvised or designed with great care. Cameras have been made of sea shells, many have been made of oatmeal boxes, coke cans or cookie containers, at least one has been made of a discarded refrigerator. Cameras have been cast in plaster like a face mask, constructed from beautiful hardwoods, built of metal with bellows and a range of multiple pinholes. Station wagons have been used as pinhole cameras – and rooms in large buildings.
 Pinhole photography is lensless photography. A tiny hole replaces the lens. Light passes through the hole; an image is formed in the camera. Pinhole cameras are used for fun, for art and for science.
PRINCIPLE AND CHARACTERISTICS OF PIN HOLE CAMERA
As mentioned above, the image in the pinhole camera is created on the basis of the rectilinear propagation of light. Each point on the surface of an illuminated object reflects rays of light in all directions. The hole lets through a certain number of these rays which continue on their course until they meet the projection plane where they produce a reverse image of the object. Thus the point is not reproduced as a point, but as a small disc, resulting in an image which is slightly out of focus. This description would suggest that the smaller the hole, the sharper the image.
The image created by a pinhole camera has certain characteristics which we won't find in classical lens photography. Another special characteristic is the infinite depth of field which, in a single photograph, allows objects to be captured with equal sharpness whether they are very close up or far away.
The pinhole camera takes in an extremely wide angle. The rays of light, however, take much longer to reach the edges of the negative than the centre, thus the picture is less exposed along the edges and therefore darkens.
A certain disadvantage of the pinhole camera is the amount of light allowed through (small aperture), which complicates and sometimes prevents entirely the photographing of moving subjects. Exposure time is normally counted in seconds or minutes but, in bad lighting conditions, this could be hours or even days (see Determining exposure times for pinhole cameras).
Pinhole images are softer – less sharp – than pictures made with a lens. The images have nearly infinite depth of field. Wide angle images remain absolutely rectilinear. On the other hand, pinhole images suffer from greater chromatic aberration than pictures made with a simple lens, and they tolerate little enlargement.
Exposures are long, ranging from half a second to several hours. Images are exposed on film or paper – negative or positive; black and white, or color.
Pinhole optics, by the way, are not only used in photography. There is one animal in nature which uses a pinhole for seeing – the mollusk Nautilus. Each eye has an accommodating aperture – the aperture can enlarge or shrink. In this drawing, originally taken from a book published by Arthur Willey in 1900, the eye is the oval opening to the upper right.
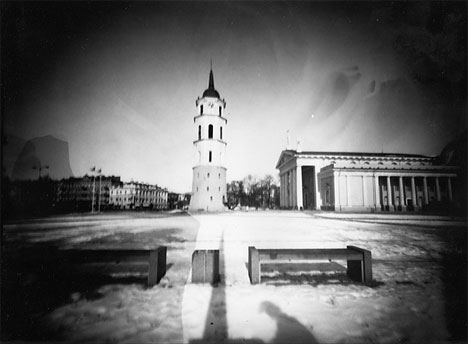
This sample result of Pinhole Photography :
This sample result of Pinhole Photography :
LETS MAKE OWN PINHOLE CAMERA
After We know about what is pinhole camera and know about the principle and characteristic, now lets do some experiment to make own pinhole camera. For tutorial you can watch for video below :
for other tutorial you can visit :
Formulas
According to Eric Renner at least 50 charts suggesting optimal pinhole diameters have been devised in the last 125 years (Renner 1995:118). In my own reading the last six years I have come across about fifteen charts or formulas, a few of which may be derived from the same basic formulas. It should be noted that the diameter of the pinhole is not really critical. But for every focal length there is an "optimal" diameter, i.e. a diameter which produces the sharpest possible image. The word optimal actually is not a felicitous term, since the pinhole photographer or artist may not be striving for the greatest possible sharpness. There are beautiful pinhole images which are intentionally softer than what is technically possible. A good pinhole image is something else than a blurred, out of focus, lens image.
Up to a certain point a small pinhole will produce a sharper image than a larger one. If the pinhole is too small, the image gets less sharp because of diffraction. The hole should be perfectly round, without ragged edges. It may be checked with a magnifier or an enlarger.
Joseph Petzval of Vienna apparently was the first, in 1857, to attempt to find a mathematical formula of the optimal pinhole diameter for the sharpest definition in a pinhole image. The British Nobel Prize winner Lord Rayleigh (John William Strutt, 1842–1919) worked on pinhole diameter formulas for ten years and published his work in Nature (1891). Lord Rayleigh's formula is still one of the formulas used to today. A number of others have been published since the 1880s.
Lord Rayleigh's formula for subject distances above 1 meter may be written as follows:
d = 1.9 * sqrt (l * f),
where d = pinhole diameter, l = wavelength of light and f = focal length or distance from pinhole to light-sensitive material.
d = 1.9 * sqrt (l * f),
where d = pinhole diameter, l = wavelength of light and f = focal length or distance from pinhole to light-sensitive material.
For the wavelength of light different average values may be substituted. Often the value of the yellow-green spectrum is used, i.e. 0.00055 mm.
According to Renner (1995: 117) most formulas used today are of the following general form:
r = sqrt (l * c * f)
r = pinhole radius
l = wavelength of light
c = a constant, usually a decimal fraction between 0.5 and 1
f = focal length
l = wavelength of light
c = a constant, usually a decimal fraction between 0.5 and 1
f = focal length
Platt (1989:73) provides the following optimal pinhole formula:
d x d = f/k, where k is a constant of approx. 1300
d x d = f/k, where k is a constant of approx. 1300
Dobson (1991) provides this formula:
d = sqrt (f)/25
d = sqrt (f)/25
Lord Rayleigh's formula and those published by Platt and Dobson all give somewhat different results. Andrew Davidhazy of the Rochester Institute of Technology lists several other formulas in a posting on the net.
Four, slightly different, charts of optimal pinhole diameters are reproduced below. Some of the charts have been simplified by leaving out references to needle numbers. Holter's chart, published in Norwegian, has been translated by me. Platt's chart differs from the others by consistently giving smaller apertures.
Bogre (1988)
| Focal length | Best aperture diameter | Equivalent f-stop | Exposure factor for f/22 |
|---|---|---|---|
| 50 mm | 0.29 mm | f/174 | 63 x |
| 75 mm | 0.35 mm | f/213 | 94 x |
| 100 mm | 0.41 mm | f/246 | 125 x |
| 125 mm | 0.45 mm | f/275 | 157 x |
| 150 mm | 0.50 mm | f/203 | 188 x |
| 200 mm | 0.57 mm | f/348 | 250 x |
| 250 mm | 0.64 mm | f/389 | 313 x |
| 300 mm | 0.70 mm | f/426 | 376 x |
Platt (1989)
| Focal length (mm) | Pinhole diameter (mm) | f-stop |
|---|---|---|
| 130 | 0.33 | 380 |
| 210 | 0.40 | 500 |
| 260 | 0.46 | 550 |
| 320 | 0.50 | 650 |
| 420 | 0.58 | 690 |
| 550 | 0.66 | 800 |
| 650 | 0.74 | 930 |
| 750 | 0.79 | 960 |
| 1000 | 0.91 | 1120 |
Holter (1990)
| Focal length (mm) | Pinhole diameter (mm) | f-stop | Exposure factor for f/16 |
|---|---|---|---|
| 10 | 0.14 | 70 | 20 |
| 20 | 0.20 | 100 | 40 |
| 30 | 0.24 | 125 | 60 |
| 40 | 0.28 | 140 | 80 |
| 50 | 0.31 | 160 | 100 |
| 60 | 0.34 | 180 | 125 |
| 70 | 0.37 | 190 | 140 |
| 80 | 0.40 | 200 | 160 |
| 90 | 0.42 | 214 | 180 |
| 100 | 0.45 | 220 | 190 |
| 150 | 0.54 | 280 | 300 |
| 200 | 0.63 | 318 | 400 |
| 250 | 0.70 | 360 | 500 |
| 300 | 0.78 | 380 | 560 |
| 350 | 0.84 | 418 | 700 |
| 400 | 0.89 | 450 | 800 |
Fuller (1992)
It should be borne in mind that for most purposes the diameter is not really critical, as the different values in the charts above may demonstrate.If you wanna get accurate calculation you can try this software : PINHOLEDESIGNER 2.0 you can donwload Here
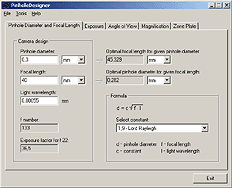 |
Program window for calculating the optimal diameter of the pinhole and optimal focal length. |
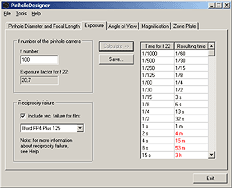 |
| Program window for calculating exposure times. |


