

Sony has announced the much leaked NEX-7 enthusiast-targeted mirrorless interchangeable lens camera. It packs a 24MP APS-C CMOS sensor and 2.4M dot OLED electronic viewfinder into its magnesium alloy body and yet still finds room for a pop-up flash and Alpha hot shoe.
This unique combination of sensor and processor assures ultra-rapid shooting responses, plus flawless image quality with ultra-low noise when shooting still images or Full HD video. Extending from ISO 100-16000, the ultra-high sensitivity range makes it easy to capture clean, low-noise images in dimly lit interiors or at dusk.
Responses are accelerated further by a shutter release lag of just 0.02 seconds – the fastest of any interchangeable lens digital camera in the world. Quick, precise AF is enhanced by new Object Tracking that keeps accurate focus lock on a selected target, even when it’s moving in the frame.
The NEX-7 offers quick, easy control over creative settings via an intuitive new TRINAVI control. Two control dials on the top of the camera are complemented by a control wheel.


 Pushing the navigation button cycles quickly through various shooting modes, allowing enthusiasts to make custom adjustments and control images with the flexibility of a DSLR camera.
The NEX-7 uses a new shutter arrangement, with an (optional) electronic first curtain. In other words, the camera no longer has to close the shutter then open it again to start the exposure, and according to Sony this decreases shutter lag from 100ms to just 20ms. This isn't completely new technology - Canon's live view capable DSLRs have been using it since the EOS 40D of 2007 - but it's very welcome to see it implemented in this type of camera.
Pushing the navigation button cycles quickly through various shooting modes, allowing enthusiasts to make custom adjustments and control images with the flexibility of a DSLR camera.
The NEX-7 uses a new shutter arrangement, with an (optional) electronic first curtain. In other words, the camera no longer has to close the shutter then open it again to start the exposure, and according to Sony this decreases shutter lag from 100ms to just 20ms. This isn't completely new technology - Canon's live view capable DSLRs have been using it since the EOS 40D of 2007 - but it's very welcome to see it implemented in this type of camera. 
Further indication, if any were needed, of the NEX-7's serious intentions is provided by the co-announced Carl Zeiss-branded E 24mm F1.8 lens (also known as the SEL24F18Z). This offers a field of view equivalent to a 35mm lens on full frame, and places the NEX-7 squarely up against the likes of the Fujifilm FinePix X100 (with its fixed 23mm F2 lens), as well as the E-P3. The NEX-7 will also be sold with a black version of the standard E 18-55mm F3.5-5.6 OSS kit zoom.
The NEX-7 will be available in November for $1350 with a 18-55mm kit lens or $1200 for the body alone. Meanwhile the NEX-5N will be available in September with the same kit lens for $700, or on its own for $600.
| Basic Specifications | |
|---|---|
| Resolution: | 24.30 Megapixels |
| Kit Lens: | 3.00x zoom 18-55mm (27-83mm eq.) |
| Viewfinder: | LCD |
| LCD Size: | 3.0 inch |
| ISO: | 100-16000 |
| Shutter: | 30-1/4000 |
| Max Aperture: | 3.5 |
| Dimensions: | 4.7 x 2.6 x 1.7 in. (120 x 67 x 43 mm) |
| Weight: | 14.6 oz (415 g) |
| MSRP: | $1,350 |
| Availability: | 11/2011 |
The default assignments for the three Tri-Navi dials change depending on the shooting mode you're in. Here's a table listing assignments for each dial in each major camera mode:
| Sony NEX-7 Default Tri-Navi Dial Assignments | |||
Shooting Mode
|
Left Dial
|
Right Dial
|
Rear Dial
|
| iAuto | No Function | No Function | No Function |
| Program Auto | Program Shift | Exposure Compensation | ISO |
| Aperture Priority | Aperture Value | Exposure Compensation | ISO |
| Shutter Priority | Shutter Speed | Exposure Compensation | ISO |
| Manual | Shutter Speed | Aperture Value | ISO |
| 3D Sweep Panorama | Right/Left direction | Exposure Compensation | ? (prototype bug) |
| 2D Sweep Panorama | Right/Left-Up/Down direction | Exposure Compensation | ? (prototype bug) |
| Anti Motion Blur | No Function | Exposure Compensation | No Function |
| Sony NEX-7 Optional Tri-Navi Dial Assignments | |||
Settings Group
|
Left Dial
|
Right Dial
|
Rear Dial
|
| Focus Settings | Focus Area Select | Left/Right focus position | Up/Down focus position |
| White Balance | White Balance Preset | A/B color adjust | G/M color adjust |
| D-Range (DRO) | Level (1-5) | Exposure Compensation | DRO Off/DRO/HDR |
| D-Range (HDR) | EV Spread | Exposure Compensation | DRO Off/DRO/HDR |
| Creative Style | Creative Style Selection | Amount (+/-3) of parameter selected by rear dial | Sharpness, Saturation, Contrast |
| Picture Effects | No Function | Select among options for current Picture Effect | Choose Picture Effect (Miniature, Partial Color, etc.) |
| Custom | (see below) | (see below) | (see below) |
In Custom mode, you can assign any of 9 functions plus "Not Set" to
any of the three dials. The only restriction is that you can't assign
the same function to more than one dial. The nine functions that can be
assigned to the control dials via the Custom option are:

Sony NEX-7 specification highlights
- All-new 24MP APS-C CMOS sensor (shared with the SLT-A7 and A657)
- ISO 100-16000
- Built-in 2.4M dot OLED EVF with eye sensor
- Electronic first-curtain shutter (cuts response time from 100ms to 20ms)
- 'AVCHD Progressive' 1080p60 HD movie recording with built-in stereo mic
- Tilting rear screen
- Three-dial user interface
- Built in flash and Alpha hotshoe
- Infra-red remote control receiver
- Microphone input socket
- Exposure Compensation
- Autofocus Mode
- Metering Mode (pattern)
- White balance preset (Auto, Daylight, etc.)
- DRO/Auto HDR mode (Off/DRO/HDR, but also Off/ DRO Level 1-5, Auto HDR/ HDR EV spread 1-6)
- Creative Style preset
- Picture Effect
- Quality (JPEG Fine/JPEG Standard/RAW/JPEG+RAW)
- "Not Set (in case you don't want to assign any function to that dial)
Bottom line, the NEX-7's new Tri-Navi interface offers more
flexibility and configurability than anything we've seen to date on a
Compact System Camera.


The Sony NEX-7 is
a Compact System Camera unlike any other yet produced. Up to now there
has broadly been two types of CSC: DSLR style and compact camera style,
the key difference between them apart from shape, being the inclusion of
a built-in electronic viewfinder (EVF) in the former. The NEX-7 is a
hybrid of the two styles. It takes the compact styling of the rest of
the NEX range as a starting point, but blows it up in size and adds an
EVF. In outward appearance its styling and sober black-only finish is
reminiscent of M series Leicas and immediately conveys that this is a
serious camera aimed at a different and more advanced audience that CSCs
have targeted thus far.
Alpha Mount Adaptor
One of the appeals of the
NEX system is that its shallow body enables the attachment of adaptors
for pretty much any lens mount. Sony's new LA-EA2 Alpha mount adaptor
features its own translucent mirror and AF module so that any Alpha
lenses attached to it behave like they do on Alpha cameras, with the
superior phase detection AF. But with the right mount you can fit all
kinds of lenses, both current and obsolete, and it is envisaged that the
NEX-7 will be popular with owners of Leica M series lenses in
particular.
The NEX-7 we handled is an early pre-production model and we were
not allowed to put an SD card in it to assess to image quality, as
there's still some tweaking to be done to the firmware, but from a
handling and usability perspective the NEX-7 is impressive. Its discreet
form makes it an ideal street photographer's camera. The tilting 921k
dot LCD screen facilitates candid shooting but the inclusion of that
superb EVF, which we have already seen on the Alpha 77, makes it a great
option for those who would never consider buying a camera without a
viewfinder.

 |
| Adapter For Addition Lens |
 |
| Adapter with addition Lens |
 |
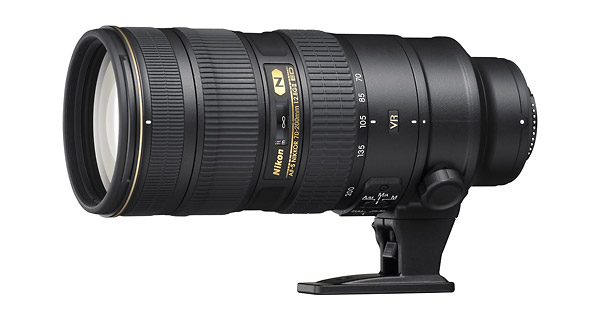
| Sony NEX-7 With Tele Lens |


